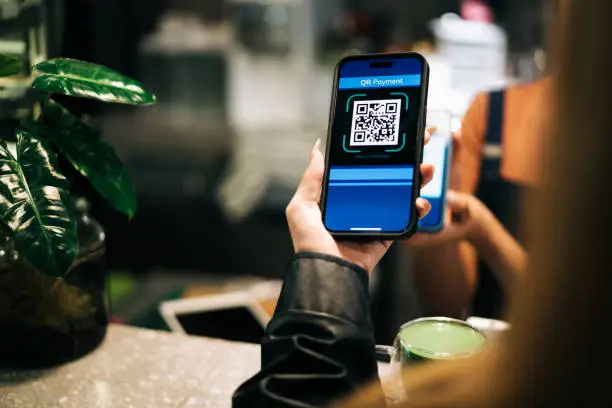
Category: eSIM

  • Step by Step Guide to Setting Up a Data eSIM on Your iPhone

    Setting up a Data eSIM on Your iPhone has become one of the easiest ways to enjoy reliable internet while travelling or when you need instant connectivity without inserting a physical SIM card. The process is fast, secure, and supported on most modern iPhones.

    With a Data eSIM on Your iPhone, you can stay online for maps, browsing, social media, streaming, and messaging apps that use the internet. Nexar provides affordable and easy to activate plans that work smoothly on supported devices.

    This guide walks you through everything you need to know about using a Data eSIM on Your iPhone, how to activate eSIM on iPhone, and how to install a data eSIM for iPhone manually or with a QR code.

    Data eSIM on Your iPhone

    How a Data eSIM Works on Your iPhone

    A Data eSIM on Your iPhone is a digital SIM built into your device. It removes the need for a physical SIM card and allows your phone to store multiple eSIM profiles. This makes it extremely useful for travel because you can switch between plans anytime. A Data eSIM on Your iPhone gives you internet only. It does not support traditional sms or voice calls. For calls and messages, use apps like WhatsApp, FaceTime or Skype.

    This makes the data eSIM for iPhone perfect for travellers who only need high speed internet without roaming charges.

    Requirements Before You Activate eSIM on iPhone

    You can also learn more about Apple’s requirements here

    How to Purchase a Data eSIM for iPhone from Nexar

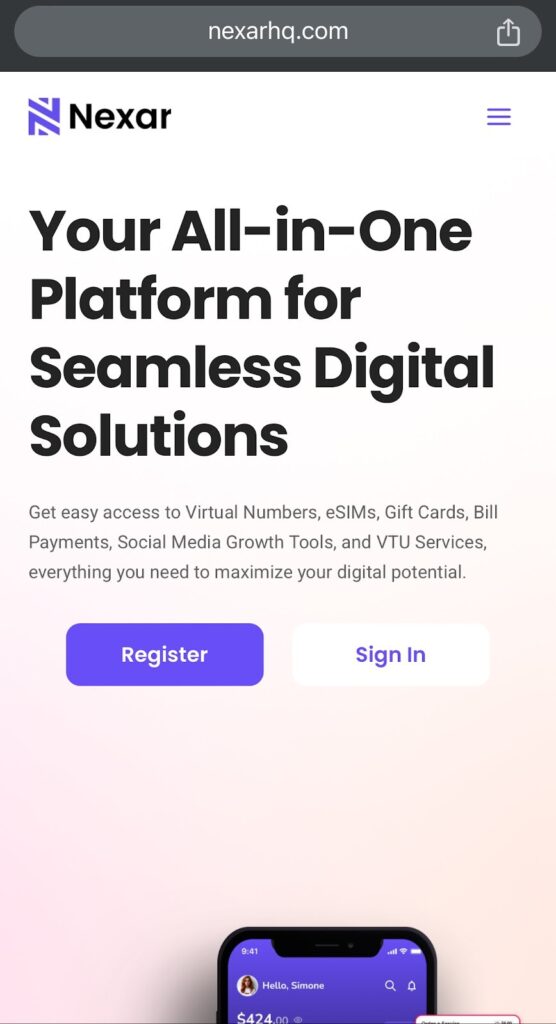
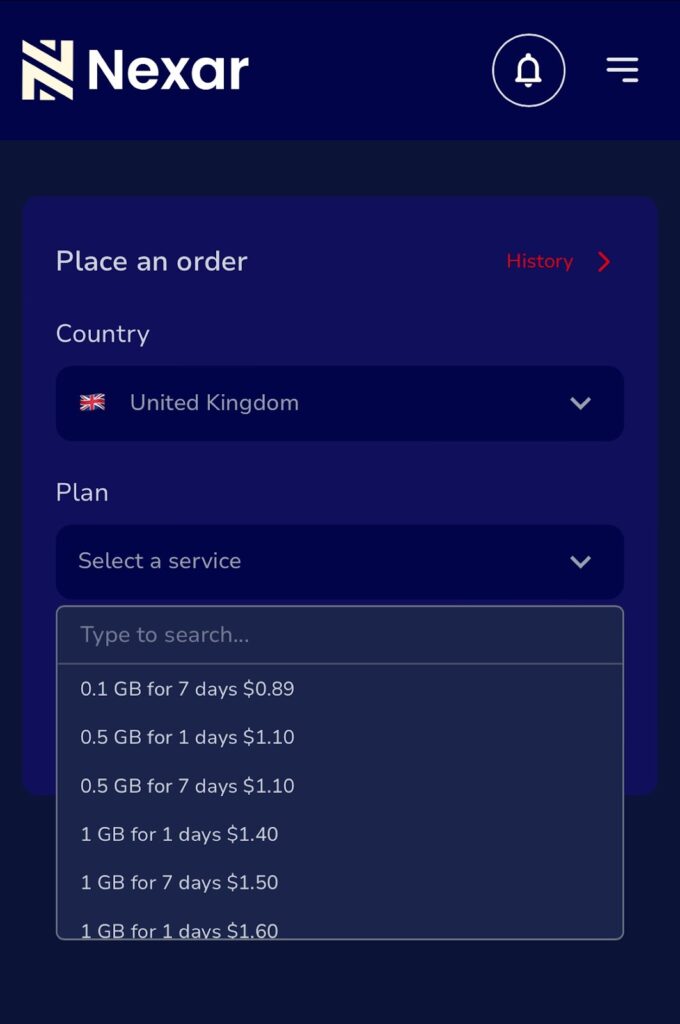
    Before we get started on setting up your eSIM, it’s good to know that Nexar sells affordable data eSIM plans for travellers and everyday users. You can buy and activate your plan instantly, without waiting for physical delivery or long verification steps. Here’s how to purchase one from Nexar:

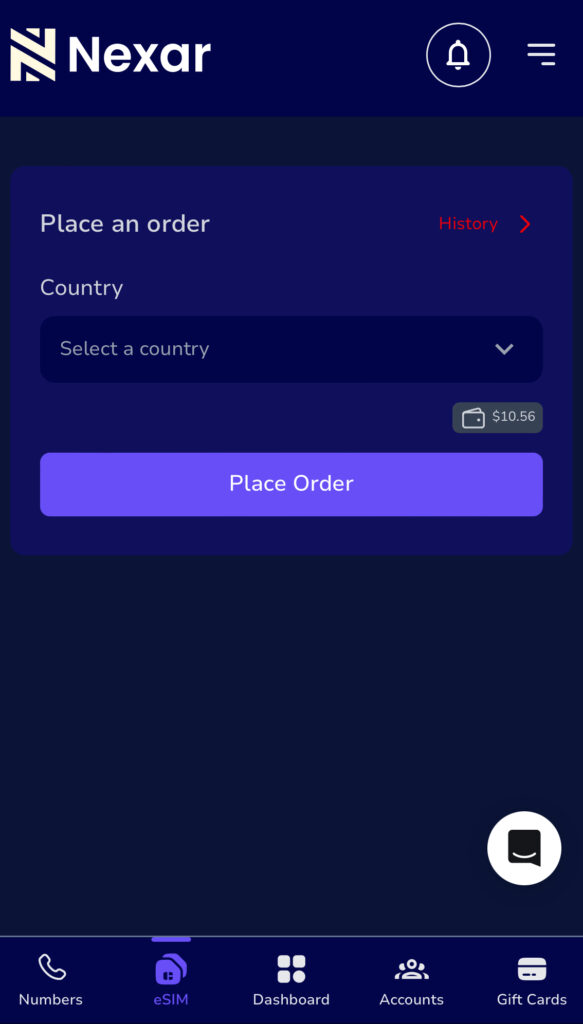
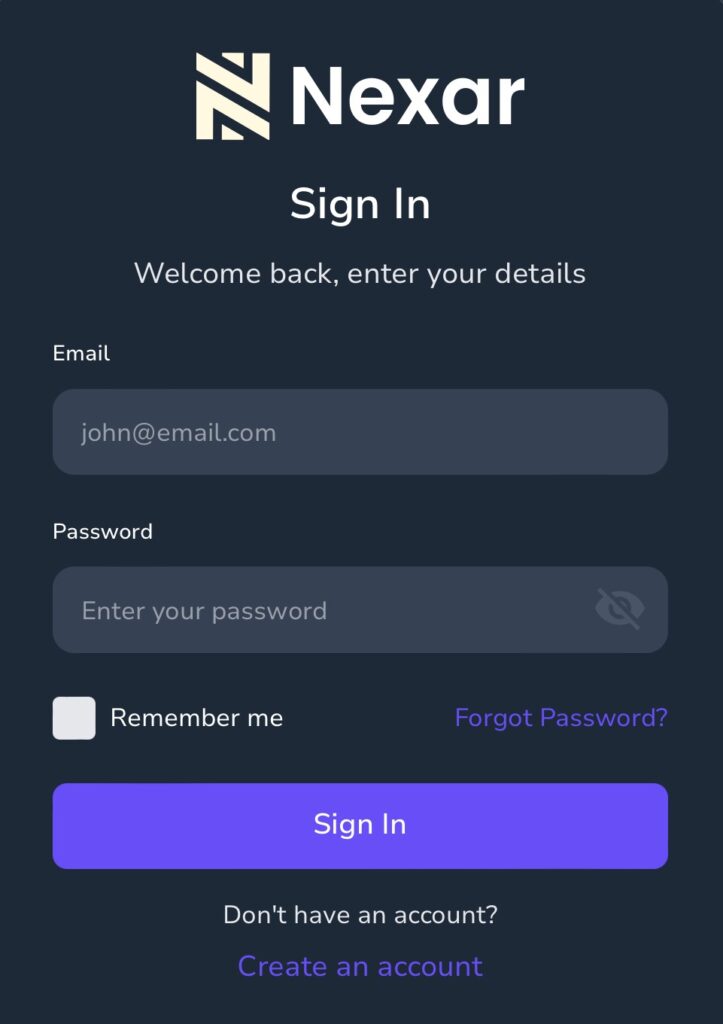
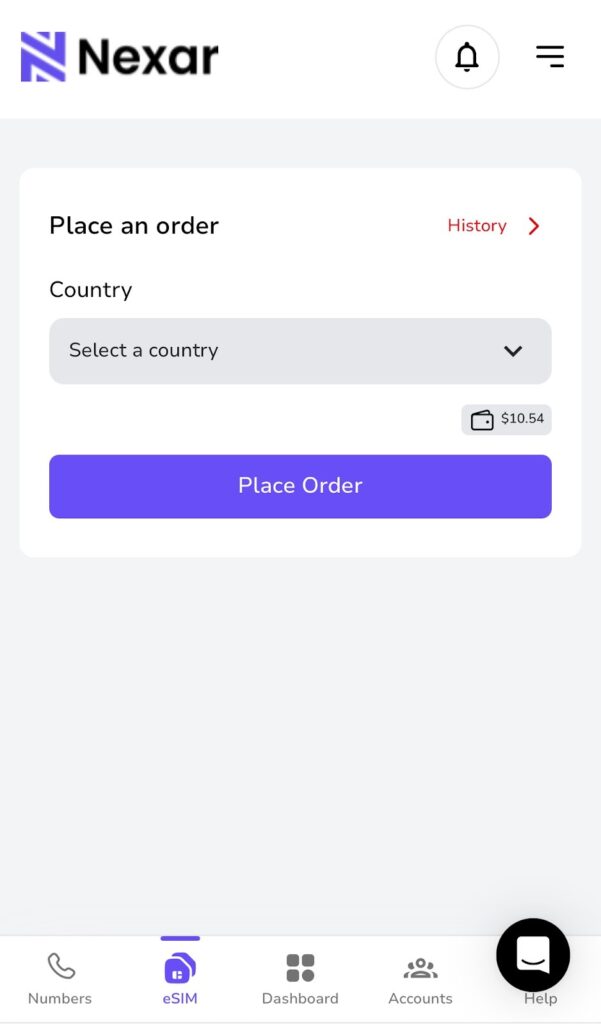
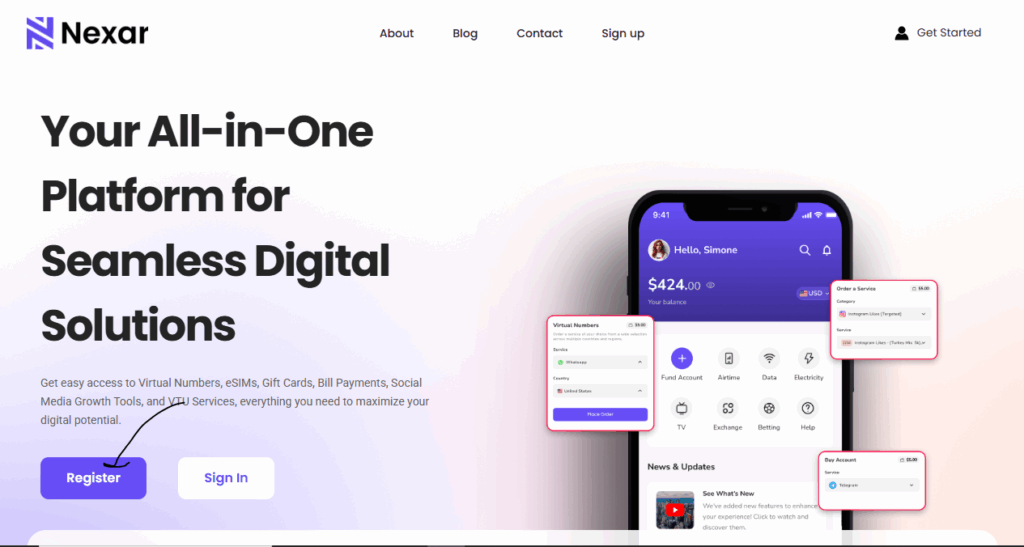
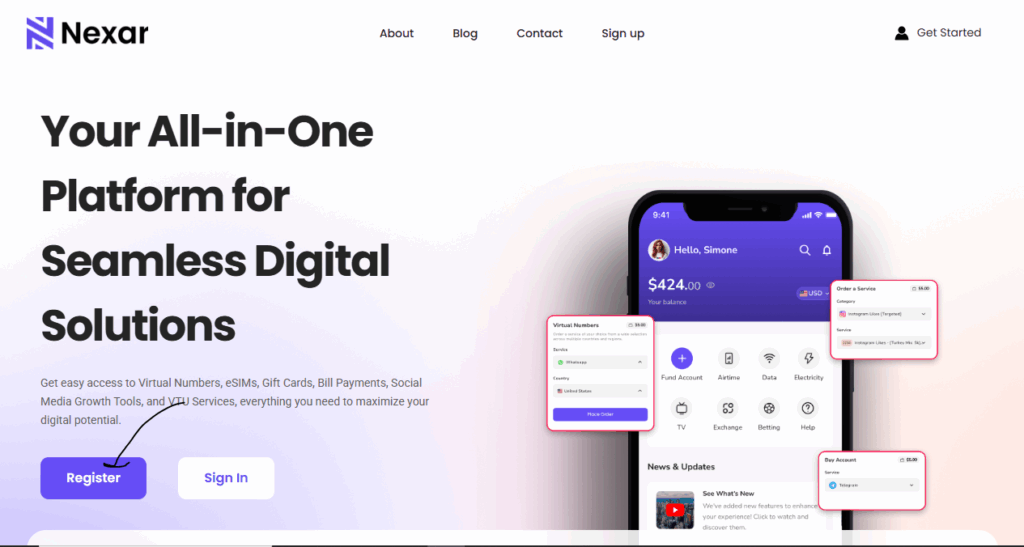
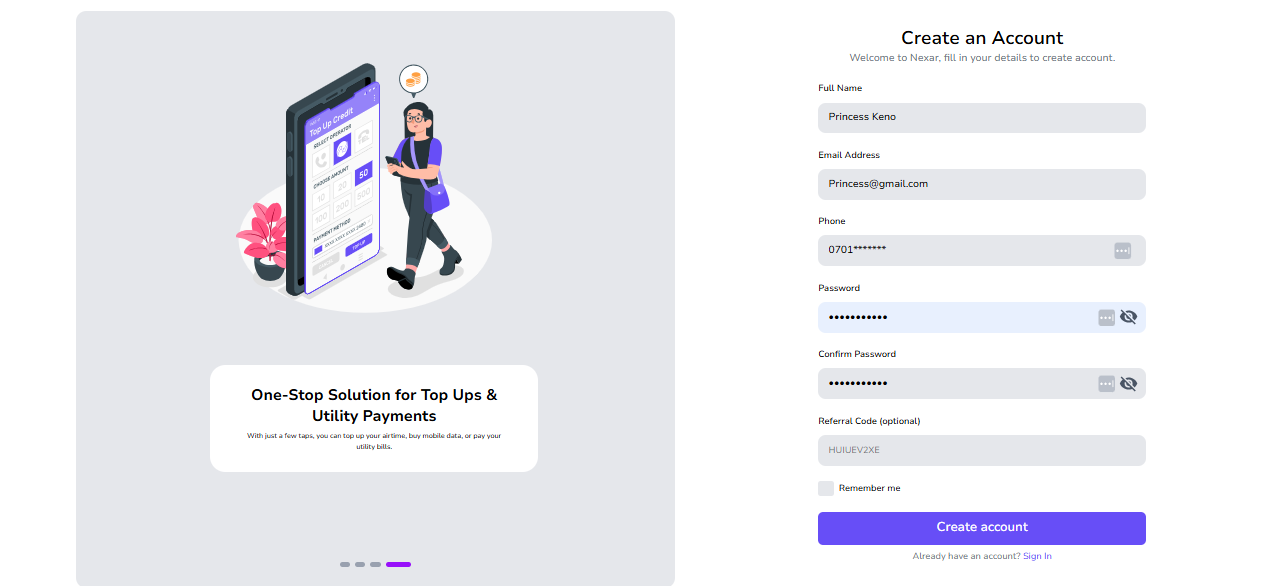
    1. Sign up by clicking this link.
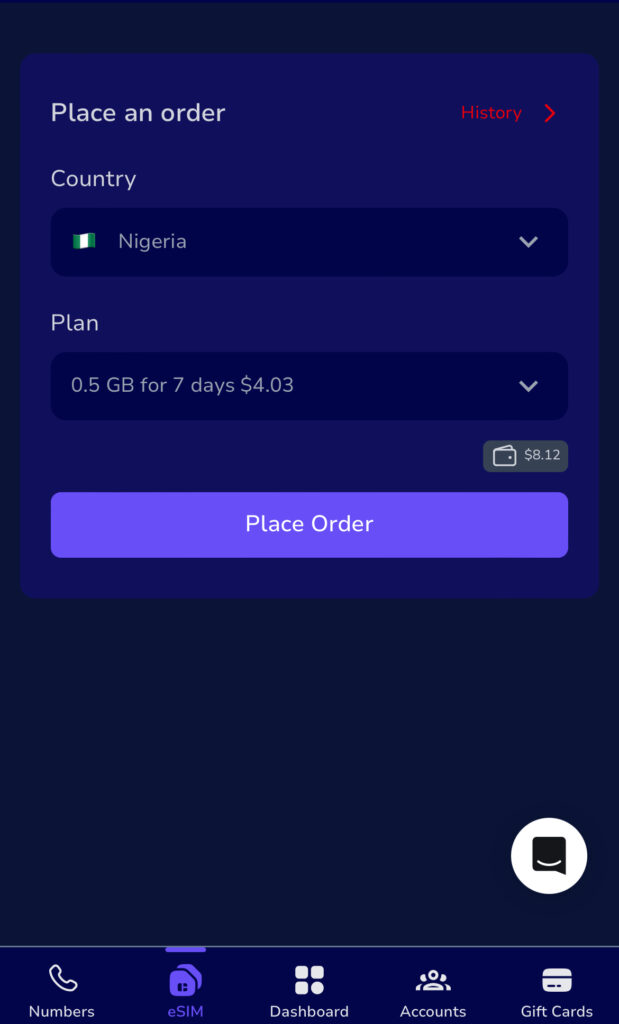
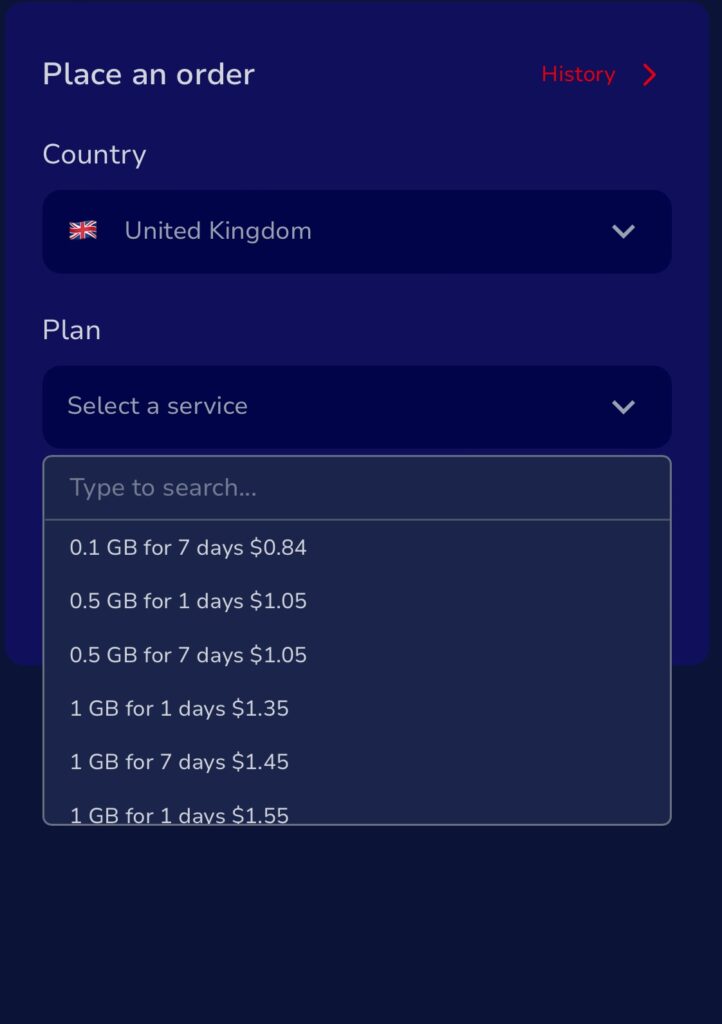
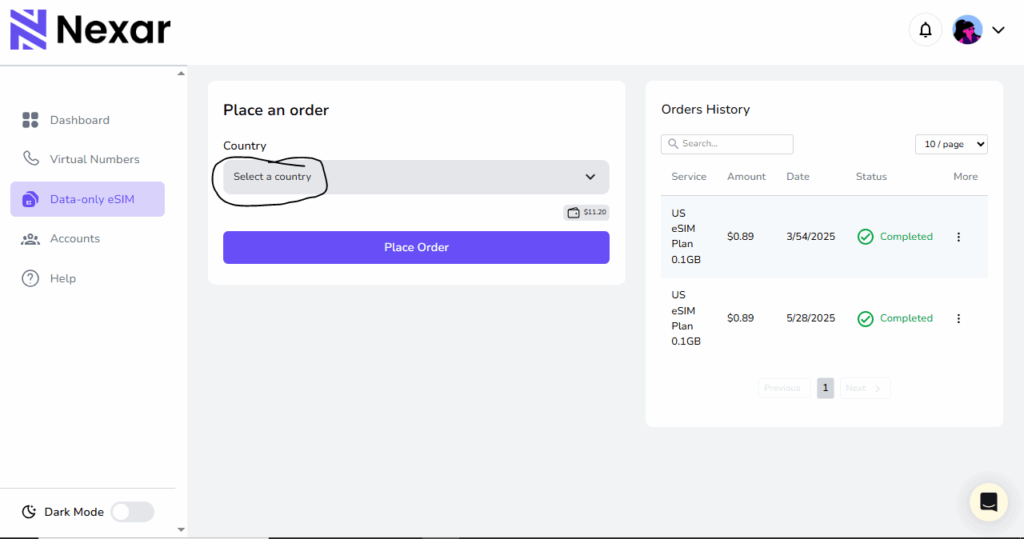
    2. Select the country you are travelling to
    3. Choose your preferred data plan
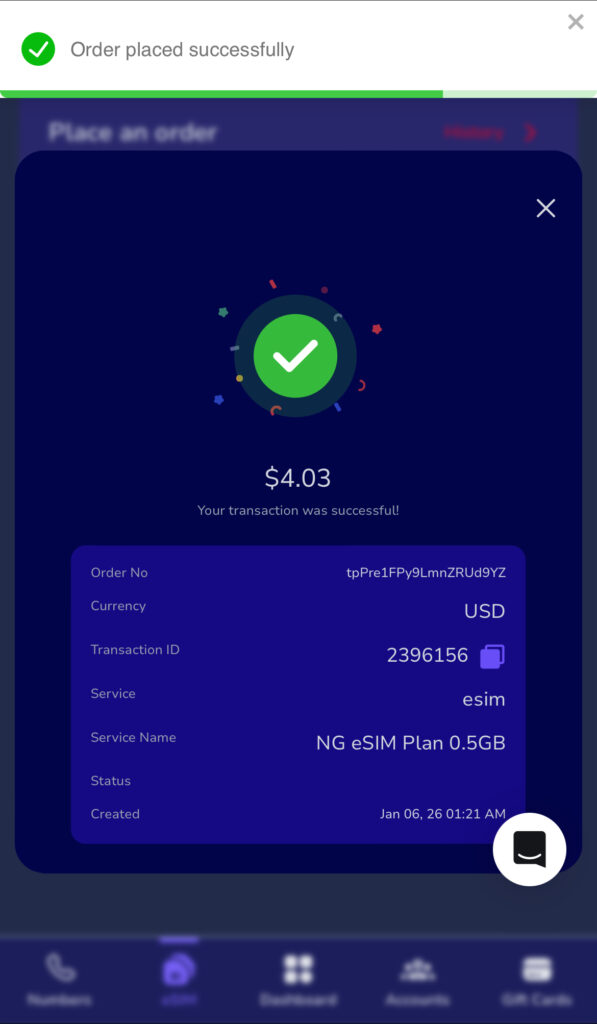
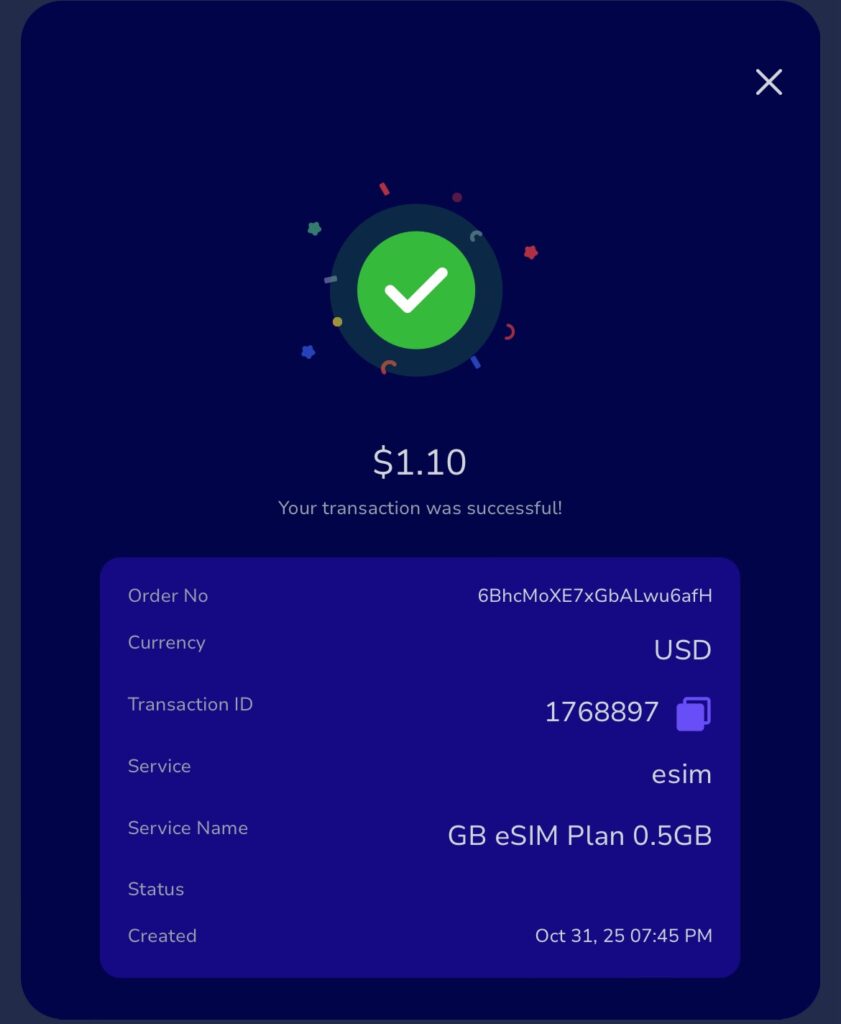
    4. Tap Place Order

    Remember that the Data eSIM on Your iPhone will only work when you are physically inside the selected country.

    How to Activate Your Data eSIM on Your iPhone

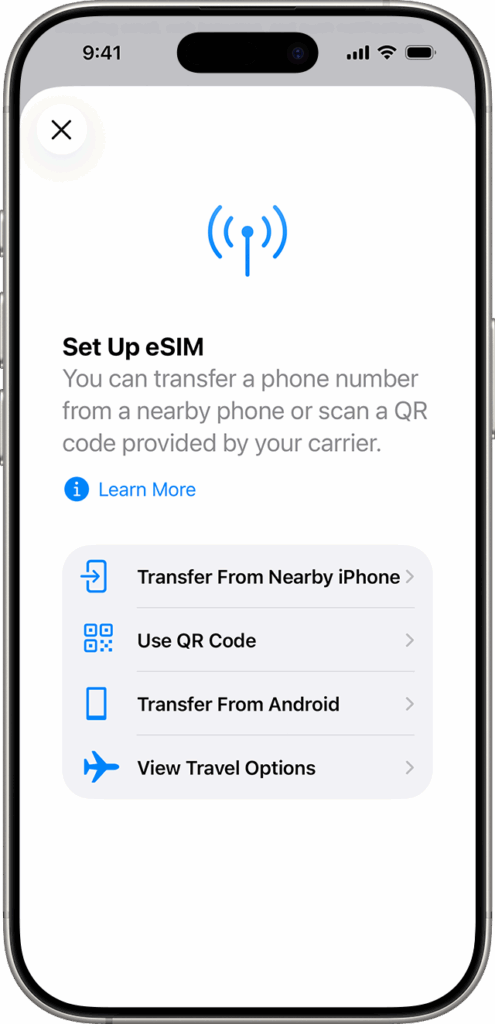
    There are several ways to activate eSIM on iPhone. Different methods work depending on your carrier, device model and region. Below are the supported activation methods following Apple’s setup style.

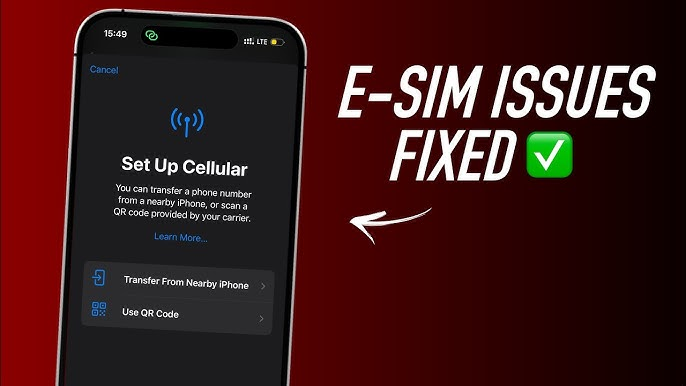
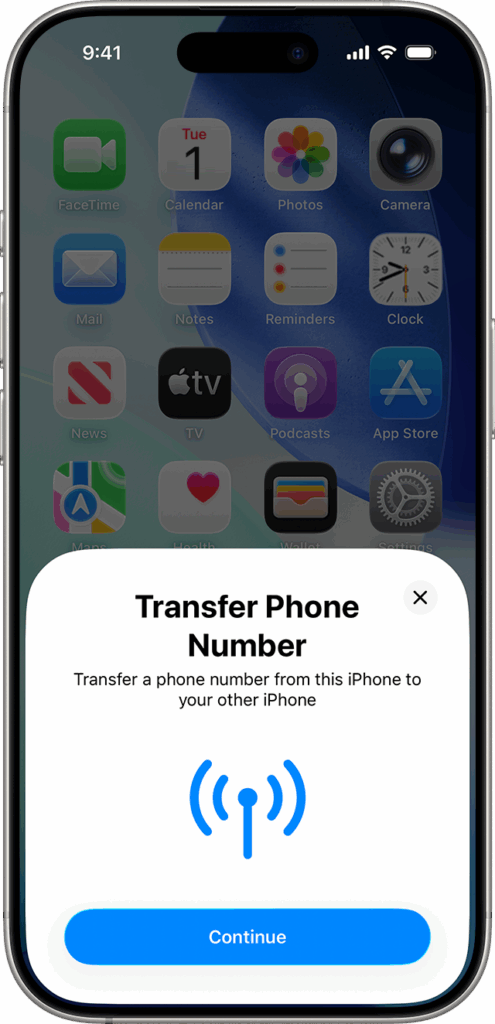
    1. Activate eSIM on iPhone using Quick Transfer

    If you are moving a line from your old iPhone to a new one, you can use Quick Transfer.

    1. Make sure both phones are signed in with the same Apple ID
    1. Keep Bluetooth on
    1. Place both phones close
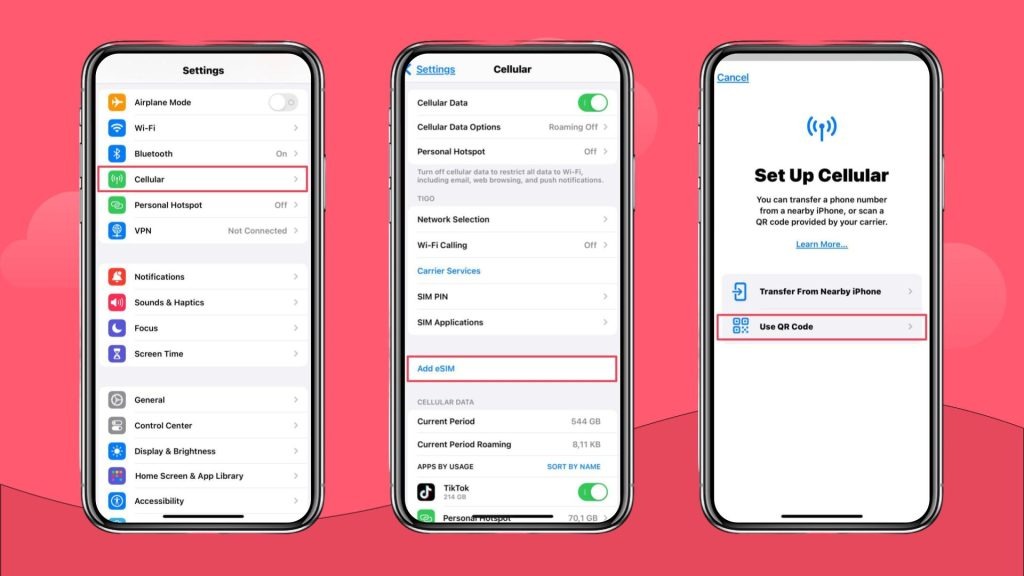
    1. Go to Settings, tap Cellular, then tap Add eSIM
    1. Choose a number to transfer
    1. Follow the instructions on the old iPhone
    1. Wait for activation

    This method is great for personal numbers but not necessary for a travel eSIM.

    2. Activate eSIM on iPhone using QR Code

    If your provider gives you a QR code, follow these steps.

    1. Open Settings
    1. Tap Cellular or Mobile Data
    1. Tap Add Cellular Plan
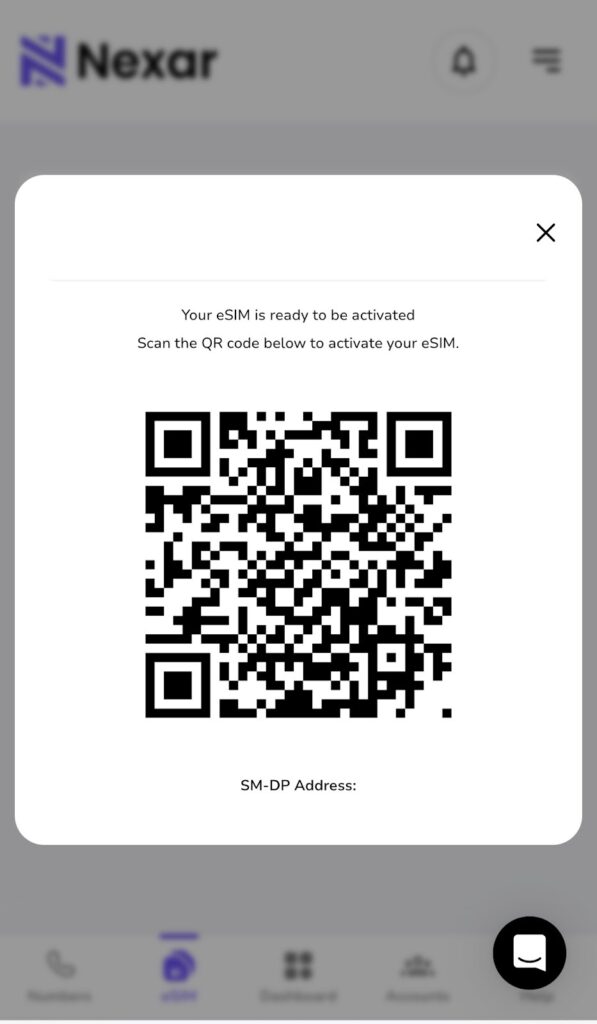
    1. Scan the QR code
    1. If asked, enter the confirmation code
    1. Choose a label for your plan
    1. Select the plan as data only

    Your Data eSIM on Your iPhone should appear under Cellular Plans.

    How to Manually Install a Data eSIM for iPhone

    Sometimes, your provider lets you enter the eSIM details manually. Here’s how to do it.

    • Open Settings
    • Tap Cellular
    • Tap Add Cellular Plan
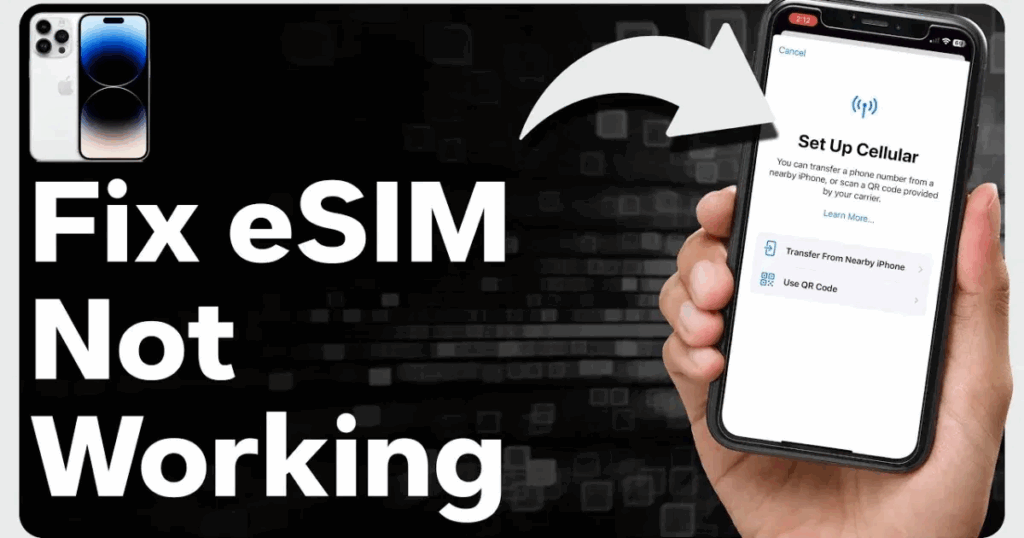
    • Tap Enter Details Manually
    • Enter the SM DP Plus Address
    • Enter the activation code
    • Enter the confirmation code if required
    • Choose a label
    • Select it as data only

    This is the method most travel eSIM users prefer.

    How to Connect to Mobile Data After Installation

    After installing your Data eSIM on Your iPhone, turn it on and connect to mobile data.

    • Go to Settings
    • Tap Cellular
    • Select your new eSIM plan
    • Turn on Data Roaming
    • Tap Cellular Data Network and input APN if required
    • Return to Cellular
    • Select your eSIM for cellular data
    • Turn OFF Allow Cellular Data Switching

    Your data eSIM for iPhone should now connect to a supported network.

    If you prefer visual instructions, watch this short video guide.

    How to Confirm Your eSIM is Working

    • Go to Settings
    • Tap Cellular
    • Look for your new data plan
    • It must show connected or activated
    • If you see signal bars beside the eSIM label, it is active.

    Important Notes When Using Nexar eSIM

    Follow the steps exactly as shown to avoid installation issues.

    1. Always use a strong VPN
    2. Nexar eSIM is data only
    3. Use WhatsApp, FaceTime, Messenger or Skype for calls and texts
    4. Your eSIM will only work in the purchased country
    5. Install the Data eSIM on Your iPhone using your browser and settings app

    Travelling soon? Buy a Nexar eSIM.

    A Data eSIM on Your iPhone is perfect for travellers because it prevents roaming charges. Once you land in your destination, your eSIM immediately connects so you can use maps, ride hailing apps, banking apps, translation tools, and social media. If you use an android device, you can also install an eSIM on your device after reading this guide.

    Final Thoughts

    Setting up a Data eSIM on Your iPhone is simple when you follow clear steps. You can activate eSIM on iPhone using QR code, manual setup, or carrier activation. Nexar provides a reliable data eSIM for iPhone that works for travel and everyday use. With the right VPN, a stable WiFi connection, and the correct installation steps, you can enjoy fast and secure data anywhere your plan supports.

    If you need reliable travel data, purchase your eSIM from Nexar and follow the instructions in this guide for a smooth setup.

  • How to Make Calls with a Data-Only eSIM: The Ultimate Guide for Nigerians

    How to Make Calls with a Data-Only eSIM: The Ultimate Guide for Nigerians

    In 2025, over 12 million Nigerians switched to eSIM technology to avoid the stress of switching SIM cards while traveling. But as the trend grows, one question keeps coming up: how do you actually make calls with a data-only eSIM?

    eSIMs have completely changed how we connect no physical SIMs, no queues at airports, and no crazy roaming charges. Yet, because most data-only eSIMs don’t come with a traditional phone number, many users still get confused about how to make or receive calls.

    In this guide, we’ll break down what a data-only eSIM is, how it works, and exactly how to make calls with a data-only eSIM using tools and apps that work anywhere. We’ll also show you how Nexar makes this process simpler, faster, and more reliable for Africans who want to stay connected globally.

    What Is an eSIM?

    Before learning how to make calls with a data-only eSIM, let’s start with the basics, what is an eSIM?

    An eSIM (Embedded SIM) is a digital SIM that’s built directly into your phone. It works just like a physical SIM card but without the hassle of swapping or inserting anything. Instead, you activate it by scanning a QR code or using a carrier app.  You can read more about it on Apple’s official eSIM setup page.

    That means no more losing SIM cards, waiting for replacements, or being tied to one network. With an eSIM, you can have multiple mobile plans and switch between them easily, perfect for travelers, remote workers, or Nigerians juggling both personal and business lines.

    The beauty of an eSIM is its freedom and when you pair it with Nexar, that freedom extends to communication, not just browsing. You can still make calls with a data-only eSIM using simple, internet-based tools.

    What Is an eSIM Plan?

    Now that you know what an eSIM is, let’s talk about eSIM plans because this is where the “data-only” part comes in.

    A data-only eSIM plan gives you access to the internet without providing a traditional phone number for calls or SMS. Think of it as WiFi on the go you can browse, message, or stream, but you can’t use it for direct cellular calls.

    However, that doesn’t mean you’re stuck. You can still make calls with a data-only eSIM using VoIP (Voice over Internet Protocol) apps.

    This setup is perfect for Nigerians who travel often or live in areas with poor local network service. Instead of juggling multiple SIMs, you can simply activate one eSIM plan and handle everything calls, verifications, and texts  through your data connection.

    How to Make a Phone Call With a Data-Only eSIM

    A cheerful person on a video call, showing “communication made easy”

    Here’s where it gets practical. Let’s go step by step on how to make calls with a data-only eSIM using the tools you already have and Nexar’s verified platform.

    1: Choose a Reliable Internet Based Calling App

    To make calls with a data-only eSIM, you’ll need an app that supports internet-based voice calls. Some great options include:

    • WhatsApp
    • Telegram
    • Skype
    • Nexar App
    • Google voice

    These apps use your data connection instead of cellular service, allowing you to make calls with a data-only eSIM anywhere in the world.

    2: Get a Virtual Number from Nexar

    Here’s where Nexar simplifies everything.

    With Nexar, you can buy a virtual phone number that connects to your eSIM instantly. This means you can make calls with a data-only eSIM and even receive OTPs and verifications for apps like WhatsApp, Instagram, and dating platforms.

    To get started:

    • Download the Nexar App.
    • Sign up and go to “Buy a Virtual Number.”
    • Choose your country (Nigeria, US, UK, or others).
    • Complete payment and get your number instantly.

    No SIM cards, no delays, no restrictions.

    3: Use Internet Calling (VoIP) Features

    The easiest way to make a phone call with a data-only eSIM is with an internet-based calling app like Whatsapp or FaceTime. These free services use VoIP (Voice Over Internet Protocol) to place and receive calls over the internet. You don’t need to worry about roaming because they’ll use your eSIM data to connect. 

    Most will automatically sync your contacts, making it easy to stay connected. The only catch is that the person you’re trying to reach must also have the calling app downloaded. We recommend choosing and downloading an app before you leave for your destination and sharing it with your friends and family so they know how best to reach you. 

    How to Get a Data-Only eSIM On Nexar

    Step 1: Check Device Compatibility

    Before you start, make sure your phone supports eSIM.

    • On iPhone: Go to Settings → General → About and look for an “EID” number.

    • On Android: Go to Settings → Network & Internet → SIM cards and check if “Add eSIM” is available.

    If your device isn’t eSIM-capable, you’ll need a compatible one.

    Step 2: Visit the Nexar Website

    • Sign in and create an account
    • Log into your account, so you’re ready for the next steps.

    Step 3: Select the “Data-Only eSIM” Plan

    • Navigate to the “eSIM” section.
    • Choose a data-only eSIM in Nigeria (or for your destination country), a plan that provides internet only.
    • Check the data volume, validity period, and price in Naira or crypto.

    Step 4: Complete Payment

    Finalize payment inside the app.

    • Confirm the transaction
    • Wait for approval

    Step 5: Activate the eSIM

    After payment:

    • You’ll receive a QR code or activation credentials inside the Nexar app.
    • On your phone: Go to Settings → SIM & mobile network → Add eSIM
    • Scan the QR code or enter the activation details manually.
    • Enable the plan and set it as Mobile Data (if needed).
    • Ensure Data Roaming is turned on if you’re using it abroad.

    Step 6: Use It for Internet — Then Expand to Voice/Call Features

    Now that your data-only eSIM is active, you can use it for internet data.

    If you want to also make calls with a data-only eSIM:

    • Download a VoIP/calling app (WhatsApp, Telegram, etc)

    Common Issues When Trying to Make Calls with a Data-Only eSIM (and How to Fix Them)

    Even though it’s simple to make calls with a data-only eSIM, you might run into some common challenges. Here’s how to fix them quickly:

    • Problem: Calls not connecting

    Fix: Check your data balance to know if it’s exhausted.

    • Problem: Can’t receive OTPs

    Fix: Use Nexar’s verified virtual number, it’s built for safe verifications.

    • Problem: Poor call quality

    Fix: Ensure a strong 4G or 5G signal. Nexar automatically optimizes call routes for clearer audio.

    Why You Should Make Calls with a Data-Only eSIM

    There are many benefits when you make calls with a data-only eSIM, especially in Nigeria:

     1.Freedom and Flexibility

    When you make calls with a data-only eSIM, you’re not tied to one network or one country. You can travel, switch networks, or manage multiple numbers — all without changing SIM cards. It’s communication on your terms.

    2. Perfect for Travellers and Remote Workers

    Tired of expensive roaming charges? With a data-only eSIM, you can call anyone using apps like WhatsApp, Telegram, or FaceTime without worrying about your location or country restrictions. It’s perfect for digital nomads, freelancers, and anyone who works on the go.

    3. Simple and Instant Setup

    Forget visiting a store or waiting for activation. You can set up your eSIM in minutes and start making calls immediately. All you need is an internet connection, and you’re good to go.

    4. Clearer, More Reliable Calls

    A data-only eSIM connects automatically to the best network available, meaning your calls stay clear and uninterrupted even in areas with weak signal strength.

    5. Cost-Effective and Hassle-Free

    You save money by avoiding roaming and multiple SIM purchases. When you make calls with a data-only eSIM, you’re only paying for what you need fast data and seamless connectivity.

    FAQs About Making Calls with a Data-Only eSIM

    Q1: Can I make regular phone calls with a data-only eSIM?

    Yes, you absolutely can! Even though a data-only eSIM doesn’t come with a traditional phone number, you can still make calls with a data-only eSIM using internet-based apps like WhatsApp, Telegram, Skype or Nexar

    Q2: Does a data-only eSIM in Nigeria support call verifications?

    It depends on your provider. With Nexar, you can get a virtual number that supports OTPs and verifications even when you’re using a data-only eSIM in Nigeria. Note that you can only make use of a data-only eSIM from Nexar when you’re in the country of the eSIM purchased.

    Q3: Is the call quality good when using a data-only eSIM?

    Absolutely. As long as your internet connection is strong, the call quality is clear and stable.

    Q4: Is it expensive to make calls with a data-only eSIM?

    Not at all. In fact, it’s usually cheaper than traditional calling! You’re simply using your internet connection (data) to make calls, and if you’re using Nexar, you’ll enjoy low rates for both local and international calls. You can even top up directly within the app no hidden charges or confusing fees.

    Final Takeaway

    You don’t need a physical SIM to make calls anymore. With Nexar, you can get a data-only eSIM, verify your accounts, and stay connected globally all from one app.

    Download the Nexar app today and experience smart, seamless calling built for modern Nigerians.

  • What is a Data eSIM and How to Buy One on Nexar

    In today’s connected world, staying online wherever you go isn’t a luxury—it’s a necessity. Whether you’re traveling for work, exploring new countries, or going on a weekend getaway, reliable internet access keeps you in touch, helps you navigate, and lets you share your moments in real time.

    But let’s be honest: buying local SIM cards abroad or paying expensive roaming fees can be stressful. That’s why you should use a data eSIM instead.

    If you’ve heard of eSIMs but aren’t sure how they work or how to get one in Nigeria, this guide will walk you through everything you need to know and show you how easy it is to buy and activate yours on Nexar.

    Buy a Data eSIM on Nexar

    What Exactly is a Data eSIM?

    A data eSIM (short for embedded SIM) is a digital version of a physical SIM card that’s built right into your smartphone. Instead of inserting or swapping SIM cards, you simply download an eSIM profile, and you’re connected.

    Think of it as a virtual SIM that does everything your regular SIM does: connects you to the internet, allows mobile data usage, and helps you stay reachable, without the need for a tiny plastic card.

    With a data eSIM, you can:

    • Access mobile data across borders without swapping SIMs
    • Enjoy flexible, affordable data plans
    • Switch between local and travel networks easily
    • Avoid roaming charges
    • Manage multiple plans on one device

    It’s the perfect solution for travelers, digital nomads, or anyone who values convenience and flexibility.

    Why You’ll Love Using a Data eSIM

    If you’re still unsure about switching to an eSIM, here’s what makes it worth it for you:

    1. You never have to swap SIMs again
    No more struggling with tiny SIM cards or worrying about losing your main line when you travel. With an eSIM, you can switch between networks or plans right from your phone settings.

    2. You get connected instantly
    After paying for your plan, your eSIM activates within minutes. There’s no waiting or paperwork involved. You can buy it, scan the QR code, and start browsing or working immediately.

    3. You choose the plan that fits your trip
    Whether you’re traveling for a few days or staying abroad for months, you’ll find a plan that matches your data needs. Nexar offers flexible, affordable options so you only pay for what you actually use.

    4. You enjoy secure, reliable internet anywhere
    Nexar eSIMs connect you to trusted networks across supported regions. That means you can enjoy a stable, high-speed connection without depending on unsafe public Wi-Fi or worrying about weak signals.

    5. You make an eco-friendly choice
    Because eSIMs are completely digital, there’s no plastic waste or packaging. It’s a smarter and greener way to stay connected while reducing your carbon footprint.

    With Nexar, everything about staying online becomes easier, from buying to activation to daily use. You stay connected wherever you go, without the stress of physical SIMs or roaming charges.

    Why You Should Choose Nexar for Your Data eSIM

    At Nexar, we make it simple for you to stay connected wherever you go. Whether you’re traveling across Africa, Europe, or beyond, our data eSIMs give you instant access to affordable data plans.

    Here’s what makes Nexar stand out:

    • Instant activation — get connected in minutes, no waiting time.
    • Pay in Naira or crypto — no currency conversion stress.
    • Multiple payment options — bank transfer, crypto, or mobile wallet.
    • Reliable global coverage — choose eSIM plans for your destination country.
    • 24/7 support — our team is always ready to help if you need assistance.

    With Nexar, you don’t need to visit a store or wait till you arrive at your destination to buy a SIM. Everything happens online—fast, secure, and convenient.

    How to Buy a Data eSIM on Nexar

    Getting your eSIM on Nexar takes less than five minutes. Here’s a simple step-by-step guide:

    Step 1: Visit the Nexar Website


    Go to nexarhq.com using your phone or laptop browser. The website is mobile-friendly, so you can do everything right from your device.

    Step 2: Select eSIM and Choose Your Destination


    Click on “eSIM” and browse through the list of available countries. Each destination has different data plans to suit your trip duration and data needs.

    Step 3: Pay in Naira or Your Local Currency


    Once you’ve selected a plan, proceed to checkout. Nexar lets you pay easily via bank transfer, debit card, or mobile wallet.

    Check out this article on how to fund your Nexar wallet.

    Step 4: Activate Instantly


    After payment, you’ll receive a QR code and activation instructions. Simply scan the QR code on your phone, and your eSIM profile will download and activate instantly. For a quick visual description, you can check out this short video on youtube.

    Step 5: Land Connected


    As soon as you arrive at your destination, your eSIM kicks in automatically. You can check maps, send messages, make bookings, or join virtual meetings right away.

    Quick Tip: Check if Your Device Supports eSIM

    Before buying a plan, make sure your phone supports eSIM. Most recent models from Apple (iPhone XR and above), Samsung (Galaxy S20 and above), and Google Pixel support eSIM technology. You can confirm on your device settings.

    Check out our article on how to set up a data eSIM on an android device here.

    Final Thoughts

    The world is moving fast and staying connected shouldn’t slow you down. A data eSIM from Nexar gives you the freedom to travel, work, and explore without worrying about expensive roaming charges or network disruptions.

    From buying to activation, everything happens in a few clicks. It’s that simple.

    So, whether you’re planning your next business trip or a solo adventure, make sure you land connected with Nexar.

    👉 Visit nexarhq.com today to get your eSIM and stay online wherever you go.

    Frequently Asked Questions (FAQ) about Dats eSIMs

    1. What does “data-only” mean?
    When we say a Nexar eSIM is data-only, it means it gives you internet access but does not support traditional voice calls or SMS. You can still make calls using apps like WhatsApp, FaceTime, or Telegram—just not through your regular phone line.

    2. Can I use my eSIM and regular SIM together?
    Yes! Most smartphones that support eSIM allow you to use both your physical SIM and eSIM at the same time. This means you can keep your main line for calls and use your Nexar eSIM for data while you travel.

    3. How long does activation take?
    Activation is instant. Once you complete your payment and scan the QR code, your eSIM will be ready to use within minutes.

    4. Can I buy my Nexar eSIM before I travel?
    Absolutely. You can buy and activate your eSIM before your trip, so it automatically connects once you land.

    5. What if my phone doesn’t support eSIM?
    Only devices with eSIM capability can use Nexar eSIMs. You can check your phone’s settings or visit Nexar’s device compatibility guide to confirm if your model supports it.

    6. Can I top up or renew my data plan?
    Yes, you can easily renew or top up your plan directly from the Nexar website when your data runs out.

  • What is SM-DP+ Address? How Does it Work to Activate eSIM Manually?

    In today’s digital world, mobile connectivity is no longer tied to tiny plastic SIM cards. Thanks to eSIM technology, users can activate mobile plans instantly without needing a physical SIM. But behind every smooth eSIM activation lies a crucial piece of information: the SM-DP+ Address.

    If you have ever wondered why your carrier sends you an SM-DP+ Address or what role it plays in activating your eSIM, this guide breaks it all down. Let’s get into it.

    SM-DP+ Address

    What is SM-DP+ Address?

    SM-DP+ Address stands for Subscription Manager Data Preparation Address. It is the server location your phone connects to in order to download your eSIM profile. When you buy or scan an eSIM, your phone needs to know where to download the eSIM profile (your mobile plan) from. The SM-DP+ Address tells your phone exactly where to go to get that data.

    Think of it like this:

    • The eSIM profile = your SIM card information (data plan, number, etc.)
    • The SM-DP+ Address = the online server where that SIM information is stored

    So when you enter the SM-DP+ address or scan a QR code, your phone connects to that server and installs your eSIM.

    Here’s why it matters:

    • The SM-DP+ Address is a server URL or domain that directs your phone to the right place to fetch your digital SIM profile.
    • Without this address, your device cannot talk to the carrier’s system or install the eSIM profile.
    • Each provider has its own SM-DP+ Address, which is why you must use the one given to you by your eSIM provider.

    Why is the SM-DP+ Address Important for eSIM Activation?

    When you activate your eSIM, your device needs to securely connect to your carrier’s server. The SM-DP+ Address makes this possible.

    Here’s what happens in the background:

    1. Your device contacts the SM-DP+ server using the address provided.
    2. The server authenticates your request.
    3. Your eSIM profile with your phone number, carrier settings, and plan details is downloaded.
    4. The eSIM activation is completed on your device.

    Without the SM-DP+ Address, this chain breaks and your eSIM will not activate.

    How to Find Your SM-DP+ Address

    If you’re wondering where to find your SM-DP+ Address, here are the common ways to locate it:

    1. Check In-App or Your Email – Most providers send the SM-DP+ Address and activation code via email or in the app when you buy an eSIM.
    2. Scan the QR Code – The QR code you receive usually contains the SM-DP+ Address along with the activation code.
    3. Contact Your Carrier – If you cannot find it, your provider’s support team can resend it.
    4. Check Device Settings On iPhones, go to Settings > Cellular > Add eSIM. On Android, go to Settings > Connections > SIM Manager > Add eSIM. If you choose “Enter details manually,” your phone will ask for the SM-DP+ Address.

    How to Manually Install an eSIM Using SM-DP+ Address

    Normally, scanning the QR code is easiest. But sometimes, manual entry is needed for example, if the QR code does not scan. Here’s how:

    On iPhone (iOS)

    1. Open Settings > Cellular (or Mobile Data).
    2. Tap Add eSIM > Enter Details Manually.
    3. Enter the SM-DP+ Address and activation code from your carrier.
    4. Follow on-screen steps to complete eSIM activation.

    On Android

    1. Open Settings > Network & Internet (or Connections).
    2. Tap Add eSIM (or “+” to add SIM).
    3. Select Enter Details Manually.
    4. Input the SM-DP+ Address and activation code.
    5. Finish setup and connect to the network.

    If you want a full step by step guide, read our article on setting up an eSIM on your android device here.

    What Happens If You Use the Wrong SM-DP+ Address?

    If the SM-DP+ Address is incorrect, your phone will not connect to your carrier’s server. This leads to errors such as “Unable to Activate eSIM.”

    In that case:

    • Double-check the details you entered.
    • Request a new QR code or SM-DP+ Address from your provider.

    Getting the SM-DP+ Address right is key because it’s what links your device to your carrier’s system. Once you have the correct one, your eSIM activation should go through smoothly.

    As more smartphones, tablets, and wearables adopt eSIM, the role of the SM-DP+ Address will only grow. Instead of waiting for a physical SIM, users can enjoy instant eSIM activation across borders. This makes eSIM perfect for frequent travelers, remote workers, and anyone who needs multiple mobile plans.

    Why Choose Nexar for Your eSIM?

    Not all eSIM providers are built the same. The quality of your eSIM experience depends on how reliable your provider’s servers are, how easy the setup process is, and how strong the connectivity remains afterward. That’s where Nexar stands out.

    With Nexar, activating your eSIM is quick and stress-free. Every eSIM purchase comes with your SM-DP+ Address and activation code clearly provided, so you can set it up instantly.

    • Instant activation anywhere, anytime
    • Global coverage that keeps you connected across borders
    • Affordable data plans that fit your budget
    • Secure and reliable servers that ensure your SM-DP+ Address works every time

    Whether you’re a travel content creator, a remote worker or frequent traveler, Nexar’s eSIM gives you freedom and flexibility without the hassle of switching SIM cards.

    If you are ready to enjoy these, get your eSIM instantly at Nexarhq.com and stay connected wherever life takes you.

    How to Get an eSIM from Nexar

    1. Sign up on Nexar
    Nigerians Travelling for Business
    2. Select eSIM and Choose your Destination
    3. Pay in Naira or Your Local Currency
    4. Activate Instantly by following the above instructions or scanning the QR code to load your eSIM.

    If you are confused, you can watch this short YouTube video on how to activate an eSIM on Nexar to get a clearer picture.

    That’s all! Your data plan kicks in immediately when you arrive, so you can book rides, check emails, or join meetings instantly!

    Final Thoughts

    The SM-DP+ Address may sound technical, but it is simply the key that unlocks your eSIM activation. It tells your device where to fetch your carrier profile, ensuring smooth, secure, and instant connectivity.

    If you have purchased an eSIM and need to set it up manually, just use the SM-DP+ Address and activation code provided by your carrier. Within minutes, your eSIM will be live. Get started with Nexar now.

  • Best Hotspot for Streaming: Pocket WiFi vs eSIMs

    Best Hotspot for Streaming: Pocket WiFi vs eSIMs

    When it comes to enjoying your favorite content whether it’s Netflix, YouTube, or live Premier League matches, the biggest deal breaker is bad internet. Slow speeds, endless buffering, or sudden disconnections can turn a fun night into frustration.

    This is why choosing the best hotspot for streaming is no longer optional; it’s essential. And for Africans who often face network instability and expensive roaming charges, the choice between Pocket WiFi vs eSIM is more than just a tech preference; it’s about convenience, cost, and peace of mind.

    Why Streaming Needs a Reliable Hotspot

    Someone in a car watching Netflix

    Streaming is part of everyday life now whether it’s Netflix, YouTube, Spotify, or even live football matches. But to enjoy it without stress, you need the best hotspot for streaming. Here’s why:

    1. No One Likes Buffering

    You’re watching your favorite Nollywood movie, and suddenly the spinning wheel shows up. Buffering not only kills the vibe but also wastes your data. With a reliable hotspot, you get smooth playback without those frustrating pauses. That’s the difference between a fun movie night and one filled with irritation.

    2. Video Quality Matters

    A poor connection doesn’t just stop your stream, it lowers the quality. Instead of HD, you’re stuck watching blurry, pixelated images. Imagine paying for Netflix Premium only to end up watching in 240p. With the best hotspot for streaming, you’ll enjoy clear, crisp videos exactly how they were meant to be seen. According to Netflix’s internet speed recommendations, you need at least 5 Mbps for HD streaming and 25 Mbps for 4K. This is why choosing the best hotspot for streaming is so important. Slow connections just won’t cut it.

    3. Live Streams Needs The Best Hotspot for Streaming

    When it comes to live church services, football matches, or Instagram Lives, you don’t get a “retry” button. If your hotspot drops, you miss out on those once in a moment experiences. That’s why a stable and strong connection is a must for streaming live events without interruption.

    4. Multiple Devices, One Connection

    Let’s be real, most people aren’t streaming alone. The kids might be on YouTube, someone else on TikTok, while you’re catching up on Netflix. A weak hotspot collapses under that kind of pressure. The best hotspot for streaming can handle multiple devices without slowing everyone down.

    5. Data Efficiency

    Did you know buffering actually wastes your data? Every time the video reloads, your device pulls more chunks of the same file. That’s extra MBs gone for nothing. With a reliable hotspot, you not only get smooth streaming but also save data in the long run.

    Pocket WiFi vs eSIM: Which Works Best for Streaming?

    Pocket WiFi for Streaming

    Imagine carrying a small device in your pocket that creates its own mini WiFi network just like the router in your house, but portable that’s what Pocket WiFi is. When you turn it on, it connects to the local mobile network (like MTN, Airtel, Glo, or AT&T abroad) and then shares that connection with your phone, laptop, or smart TV. Basically, it works like a personal hotspot, but instead of draining your phone’s battery, it runs on its own.

    • Pros:

    • Can connect multiple devices (great for groups).
    • • Works like a mini home router you can carry.
    • • Easy for non-tech users, just switch it on.

    • Cons:

    • Needs charging (another gadget to carry around).
    • Rentals can be expensive for long trips.
    • Limited coverage in rural or remote areas.
    • Hidden fair usage policies may reduce speed.

    Pocket WiFi can work, but if you’re looking for the best hotspot for streaming, it often struggles with flexibility and long term affordability.

    eSIM for Streaming

    An eSIM (embedded SIM) is a digital SIM card already inside your phone. Instead of buying a physical SIM, you just download a data plan and start using it. Think of an eSIM as a SIM card that lives inside your phone but it’s completely digital, you don’t have to insert or remove anything instead just scan a QR code or activate it through an app like Nexar and boom you’ve got data running instantly.

    So instead of buying a physical SIM card or carrying an extra Pocket WiFi device, your phone itself becomes ready to connect anywhere in the world.
    An eSIM (embedded SIM) is a digital SIM card already inside your phone. Instead of buying a physical SIM, you just download a data plan and start using it. With eSIM, setup is as quick as scanning a QR code. You can literally be watching Netflix in minutes after landing in a new country. If you’re new to digital SIMs, check out our guide on how to set up an eSIM for travel.

    • Pros:

    • No extra device, everything runs from your phone.
    • Instant setup via the Nexar app.
    • Affordable data bundles built for high usage like streaming.
    • Great coverage for both local and international travel.
    • Your phone can double as a hotspot for other devices.

    • Cons:

    • Only works on eSIM-supported devices.
    • Beginners may take time to understand switching between eSIMs.

    When comparing Pocket WiFi vs eSIM, eSIM wins for flexibility, cost, and ease making it the best hotspot for streaming for individuals and small groups.

    Why Nexar Is the Best Hotspot for Streaming

    Let’s be honest there’s nothing more frustrating than your video buffering right when the action gets good. Whether you’re watching Netflix, catching a YouTube live, or vibing to a TikTok stream, you need a connection that’s fast, steady, and affordable. That’s exactly why Nexar is the best hotspot for streaming, especially for Africans who want to stay connected wherever they go.

    Here’s why Nexar stands out:

    1. Seamless Streaming Anywhere You Go

    When it comes to watching your favorite shows or joining live events, stability is everything. With Nexar’s eSIM, you can stream high-quality videos without interruptions even while traveling across regions. It automatically connects you to the best local network, giving you smooth, buffer-free streaming wherever you are. Imagine catching your favorite football match or Netflix episode without that annoying “connection lost” message that’s the Nexar experience. It’s what makes it the best hotspot for streaming no matter where you are.

    2. Affordable and Transparent Data Plans

    Let’s face it, traditional roaming and Pocket WiFi can be expensive. But with Nexar, you get affordable, transparent data plans built for everyday users. You only pay for what you need, with zero hidden fees. This makes Nexar not just reliable, but also the best hotspot for streaming on a budget. Whether you’re a freelancer joining an online class or a student bingeing your favorite show, Nexar keeps your data costs low while keeping your connection strong.

    3. Tailored for Africans

    A lot of global apps don’t understand the unique internet challenges Africans face, fluctuating speeds, expensive roaming, or limited network options. Nexar was designed with that in mind. Its data plans, support, and network coverage are optimized for African travelers, freelancers, and creators who rely on strong, affordable internet. Simply put; Nexar gets it. It’s built for you, and it’s built to perform that’s why it’s not just good; it’s the best hotspot for streaming when you need reliable internet that actually works for your lifestyle.

    3. Quick and Easy eSIM Setup

    No need to visit a store or wait days for a SIM delivery. With Nexar, your eSIM is ready in minutes. Simply scan a QR code, choose your preferred plan, and start streaming instantly. It’s that simple you could land in South Africa or Ghana today, install Nexar, and be watching YouTube within minutes no stress, no setup delays. That’s another reason why Nexar is the best hotspot for streaming for travelers and remote workers.

    4. Global Coverage – Stay Connected Across Borders

    If you move between countries often, Nexar’s eSIM gives you seamless global coverage. You don’t need to keep swapping SIMs or carrying multiple Pocket WiFi devices. Just one app, one plan, and uninterrupted access to fast internet everywhere you go. From Nigeria to Kenya to the UK, Nexar ensures you always have the best hotspot for streaming, keeping you online wherever your journey takes you.

    5. Perfect for Live Streams and Video Calls

    If you host or join live streams, you already know how embarrassing it is when the video freezes mid-conversation. Nexar’s reliable network ensures your live sessions, Zoom calls, or gaming streams run smoothly without lag. With its fast upload and download speeds, Nexar gives you professional quality streaming from your phone.

    FAQs About the Best Hotspot for Streaming

    Q: Is Pocket WiFi still worth it for streaming?

    Yes, if you’re traveling with a big group and need many devices connected. But for most people, eSIM is cheaper and easier.

    Q: Can I use Nexar eSIM as a hotspot for my smart TV?

    Yes! Your phone can act as a WiFi hotspot so you can stream directly on TVs, laptops, or tablets.

    Q: What if my phone doesn’t support eSIM?

    You’ll need a device upgrade, but most modern smartphones (Apple, Samsung, Google Pixel) now support eSIMs.

    Final Takeaway

    At the end of the day, the best hotspot for streaming depends on your lifestyle and what matters most to you. If you prefer something that can connect multiple devices and don’t mind carrying an extra gadget, Pocket WiFi can get the job done. But if you want simplicity, lower costs, and the freedom to switch networks on the go, an eSIM is hands down the best hotspot for streaming when traveling or moving between cities. Also if your device is eSIM compatible, you can buy the eSIM unlimited data plans for a seamless connection. However, for non-eSIM-compatible devices, portable WiFi is the best option.

    With Nexar’s eSIM, you don’t just get data you get peace of mind. You can stream movies, live football matches, YouTube videos, or even your favorite TikTok creators without worrying about hidden roaming charges or unstable networks. For anyone who loves smooth, uninterrupted entertainment, Nexar makes it easy to always have the best hotspot for streaming right in your pocket.

    Get Started with Nexar Today

    Don’t let bad internet ruin your entertainment. Download the Nexar app today, set up your eSIM instantly, and enjoy the best hotspot for streaming whether you’re at home, on the road, or abroad.

  • Why eSIMs Are the Smarter Choice for Nigerians Travelling for Business — and How to Get One Easily

    In 2024, Nigerian companies spent a total of ₦164.4 billion on business travel and logistics. This was a 93.2% increase from the previous year, highlighting the growing importance of international business engagements for Nigerian enterprises.

    If you’re one of the many Nigerians travelling for business, you already know the struggle of staying connected abroad. Roaming charges are ridiculously high, buying a local SIM is stressful, and being offline at the wrong time can ruin your plans.

    But there’s a smarter way! eSIMs make it easier and cheaper to stay connected no matter where you go and for Nigerians travelling for business, this changes everything.

    In this article, we’ll explore how eSIMs make life easier for Nigerian travellers and why they are cheaper and more reliable than traditional SIMs. We’ll also show you how to get one before your next trip. Before diving in, check out our article on Best Hotspot for Streaming: Pocket WiFi vs eSIMs for tips on staying connected while travelling.

    What Is an eSIM?

    An eSIM (embedded SIM) is like a virtual SIM card built right into your smartphone. Instead of fiddling with tiny SIM cards or searching for shops in every airport, you simply buy and activate a data plan online. All you have to do is to scan a QR code and follow simple app instructions, and you’re connected as soon as you land.

    Why eSIMs Work Better for Nigerians Travelling for Business

    1. Skip SIM Card Stress
    Forget queues at airport kiosks or struggling with language barriers just to buy a SIM. With an eSIM, you purchase your plan before leaving Nigeria, activate it in minutes, and land already connected.

    2. Save Money with Transparent Pricing
    Roaming with Nigerian SIMs can burn through your budget in days. eSIMs let you compare affordable data plans for your destination upfront, so you always know what you’re paying. No surprise bills later.

    3. Keep Your Nigerian Number Active
    Don’t worry about missing important calls, SMS alerts, or bank OTPs. You can keep your Nigerian SIM in your phone for calls and texts, while your eSIM handles data abroad.

    4. One Device, Multiple Countries
    Travelling across several countries on the same trip? You can store multiple eSIM plans on your phone and switch between them in settings — no more juggling or losing SIM cards.

    5. More Secure & Reliable
    Physical SIMs can get lost, stolen, or cloned. eSIMs are built into your phone, making them safer and more reliable, especially for professionals handling sensitive information.

    What to Look for When Choosing an eSIM for Business Travel

    • Coverage & partnerships: The first thing you should look for is coverage and partnerships. You should make sure your eSIM works across multiple networks and provides good service even in remote areas. This is important because as a Nigerian travelling for business, you don’t want to lose connectivity just because you’re outside a city center. The good news is that Nexar offers coverage in 180+ countries, so you can travel widely without worrying about losing connection.
    • Transparent pricing: The most important thing you should look for is transparent pricing. You should make sure the eSIM clearly shows the cost of data, calls, and SMS with no hidden fees. If you want to plan your travel budget properly, transparent pricing will help you avoid surprise charges at the end of your trip. Nexar makes this easy by showing all costs upfront in naira, so there are no hidden surprises.
    • Security features: Security features are another key thing to consider. You should make sure the eSIM offers encryption and protection against SIM swap attacks. Unlike physical SIM cards that can be lost or cloned, a secure eSIM keeps your number and data safe while you travel. Nexar uses secure protocols to protect your information at all times.
    • Reliable support: Reliable support is essential. If you want peace of mind, choose an eSIM like Nexar that offers 24/7 customer support. Unlike using a physical SIM card where it’s hard to find help, you have someone to contact immediately if your connection drops or your plan doesn’t activate.

    How Nexar eSIM Makes It Easier for Nigerian Travellers

    Most eSIMs apps were built for Western travelers. They charge in dollars, require foreign cards, and often hide fees. Nexar eSIM was designed with Africans in mind.

    With Nexar, you can:

    • Pay in naira or with Crypto. You don’t need to worry about card restrictions or exchange rate.
    • Choose plans for multiple destinations, from the US to Europe to Africa.
    • Activate your eSIM before you fly so you land already connected.
    • Enjoy a simple, transparent interface with no hidden charges.

    It’s everything you need for a stress-free travel experience.

    How to Get Your eSIM Before Travelling

    1. Sign up on Nexar
    Nigerians Travelling for Business
    2. Select eSIM and Choose Your Destination
    3. Pay in Naira or Your Local Currency
    4. Activate Instantly by following the in-app instructions or scanning the QR code to load your eSIM.

    That’s all! Your data plan kicks in immediately when you arrive, so you can book rides, check emails, or join meetings without delay.

    Common Questions About eSIMs

    What if my device doesn’t support eSIM?

    While eSIM capability is relatively new, many modern smartphones, tablets, and wearables now include it. Always check your device’s specifications or contact the manufacturer. If you have an android device, read our guide on how to set up an eSIM for an Android device.

    What about voice & SMS?

    Some eSIM plans offer full voice/SMS support; others may be data-only. If voice matters, choose a provider that includes or allows add-ons for these services.

    What happens when I cross borders?

    Some eSIMs offer regional or global plans that auto-swap to local networks as you move across countries. Confirm cross-border support before buying. If you are going on a long road trip, read our guide on how to set up an eSIM for a long road trip.

    Will I lose my Nigerian number?

    Not necessarily. You can maintain your existing number via another eSIM profile or through forwarding services, while using a local eSIM for data. If your sim card will be dormant for a long time, watch this video to learn how to keep your number.

    Is it secure?

    eSIM provisioning is governed by secure protocols. As long as your eSIM provider is reputable and supports encryption, the risk is very low.

    Final Word

    For Nigerians travelling for business, whether you are a professional, student or frequent flyer, eSIMs are the smarter way to stay connected abroad. They’re cheaper, faster, and more reliable than roaming or juggling local SIMs. And with Nexar eSIM, you get a platform built specifically for African travelers — affordable, transparent, and easy to use.

    👉 Don’t wait until you land to figure out connectivity. Set up your Nexar eSIM today and travel stress-free.

  • Step-by-Step Guide to Setting Up a Data eSIM on Android Device

    Lagos to Ghana is only a few hours by road, but the moment you cross the Lomé border, your SIM card stops working. Suddenly, you can’t load maps, send messages, or even request a ride. For many travelers, this is a common frustration and that’s why a Nexar eSIM on Android device makes all the difference.

    With an eSIM from Nexar, you can stay connected without swapping physical SIM cards, buying a new one at the border, or worrying about losing contact. Wondering how that’s even possible? In this article, we will show you. Let’s get started.

    eSIM on Android

    What is a Nexar eSIM?

    An eSIM is a digital SIM that lets you activate a mobile plan without a physical card. At Nexar, our eSIM is designed for data only. This means you cannot use it for traditional calls or SMS texts, but you can browse the internet, use maps, and stay active on your favorite apps. For calls and messages, internet-based platforms such as WhatsApp, FaceTime, or Skype work perfectly using the eSIM data.

    It is important to note that a Nexar eSIM works only in the country where it was purchased. For example, if you buy an eSIM on Android for Ghana, it will work there but not outside the country.

    Before You Start: Check Device Compatibility

    Not all Android phones support eSIM, so the first step is confirming compatibility. Make sure your device is:

    • eSIM-compatible
    • Unlocked from any specific network
    • Running on updated software

    Also, ensure you have a stable Wi-Fi connection because the setup process requires internet access.

    How to Activate Your Nexar eSIM

    Once you purchase an eSIM from Nexar, activation is simple.

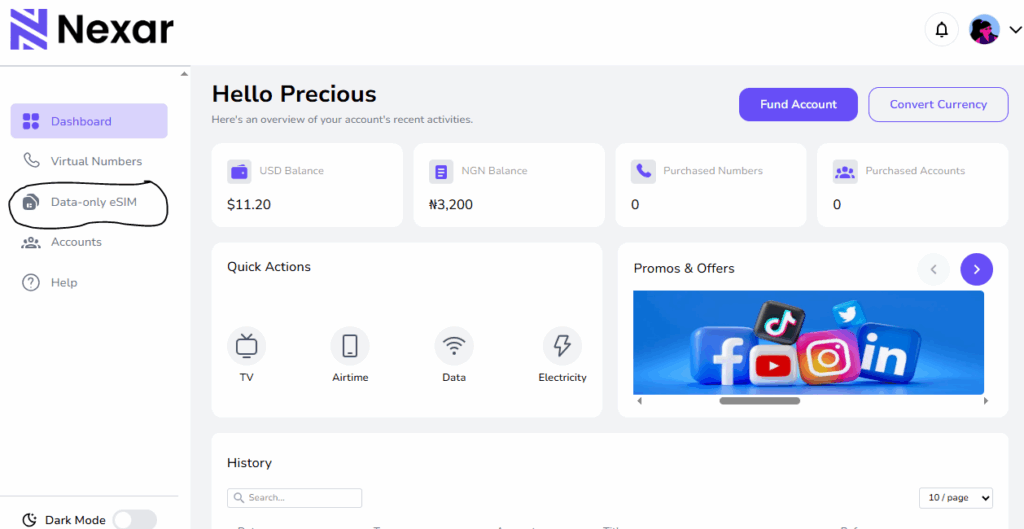
    1. Log in to your Nexar account.
    2. Go to History.
    3. Scroll right and tap the three dots.
    4. Click View Details.
    5. You will see a QR code. Screenshot it or open it on another device.
    6. On your phone, go to Settings > Mobile Network > Add eSIM.
    7. Select Use QR Code and scan it.
    8. Wait for the installation to complete.

    That is it. Your eSIM on Android will be active and ready for use.

    📺 Watch this short tutorial on Youtube: Learn how to activate your Nexar eSIM

    How to Set Up a Data eSIM on Android Phone

    Many people ask how to set up a data eSIM on Android phone, and the process is easier than it sounds. There are two main ways to install an eSIM on Android.

    Method 1: Scanning the QR Code

    1. Open Settings on your Android phone.
    2. Tap Network & Internet.
    3. Select Mobile Network then Add eSIM.
    4. Choose Use QR Code.
    5. Scan the QR code from your Nexar dashboard.
    6. Enable Mobile Data and Data Roaming.
    7. Adjust your APN settings if required.
    Method 2: Manual Entry

    1. In Settings, go to Network & Internet.
    2. Tap Mobile Network then Add eSIM.
    3. Select Enter details manually.
    4. Input the SM-DP+ Address and Activation Code from Nexar.
    5. Leave the confirmation code blank.
    6. Save and activate the eSIM.

    Tip: If you face issues with activation, using a VPN can help smooth the process.

    Device-Specific Quick Guides

    Samsung Devices

    • Go to Settings > Connections > SIM Manager > Add eSIM
    • Tap Scan QR Code or Enter Activation Code manually
    • Ensure data roaming is enabled

    Xiaomi Devices

    • Go to Settings > Mobile Networks > Manage eSIM > Add eSIM
    • Scan the QR code or enter activation details manually
    • Set eSIM as the default for mobile data and enable roaming

    Other Android Devices

    • Go to Settings > Network & Internet > SIM card or Mobile Network > Add eSIM
    • Select QR code or manual option
    • Follow prompts to finish setup

    Common Issues and Solutions

    • Outdated software → Update your phone before installing. f your software is outdated, your phone may not recognize the eSIM. Go to Settings > System > Software Update, download the latest version, and restart your device before trying again.
    • Network errors → Restart device and ensure Wi-Fi is strong.
      Sometimes poor connectivity interrupts the setup. Restart your phone, switch to a stronger Wi-Fi connection, and retry scanning the QR code or entering details. If possible, avoid using public Wi-Fi during activation.
    • Expired QR code → Always use the code provided in your Nexar dashboard.
      QR codes have a limited validity period. If you see an error saying the code has expired, log back into your Nexar account, navigate to History > View Details, and download a fresh code.
    • Installation stuck → Try manual entry with the SM-DP+ Address and Activation Code.
      If the QR method freezes or doesn’t complete, choose the Enter details manually option in your phone settings. Input the SM-DP+ Address and Activation Code from your Nexar dashboard, then save to complete setup.

    If the problem persists, check your APN settings or contact Nexar support.

    Frequently Asked Questions

    Q: Can I use my eSIM on Android alongside my regular SIM?

    Yes. Most modern Android phones support dual SIM, which means you can use your physical SIM for calls and SMS while your eSIM handles data.

    Q: What happens if I change my phone?

    Your eSIM profile is tied to one device at a time. If you switch phones, you will need to scan the QR code again or request a new one from your provider.

    Q: Is it difficult to learn how to set up a data eSIM on Android phone if I’m not tech-savvy?

    Not at all. Nexar makes the process simple. Once you receive your QR code, it takes less than five minutes to activate and start browsing.

    Final Thoughts

    Traveling without internet access can be stressful, but with an eSIM on Android, you can stay online wherever you go. If you have ever wondered how to set up a data eSIM on Android phone, Nexar makes it easy with clear instructions and quick activation. Whether you are heading to Ghana, Europe, or anywhere else, you can keep your apps, maps, and chats running smoothly.

    Will you be travelling soon? Get started today with Nexar eSIM and stay connected wherever you travel.

  • How to Set Up an eSIM for Travel on Long Road Trips 

    How to Set Up an eSIM for Travel on Long Road Trips 

    eSIM for travel is quickly becoming the go-to solution for people who don’t want to deal with unreliable networks and expensive roaming while on the road. But if you’ve ever taken a long road trip across Nigeria or even beyond, you already know how frustrating staying connected can be. One moment you’re streaming music or using Google Maps, and the next, your data is gone just when you need it most.

    Traditional SIM cards often fail travelers: roaming charges are expensive, swapping SIMs across states or countries is inconvenient, and in some regions, local SIM registration is time-consuming.

    And for freelancers, influencers, or business owners who rely on the internet to work while traveling, losing connection isn’t just a small problem it can mean missed deadlines, lost clients, or delayed payments.

    That’s where an eSIM for travel comes in. With Nexar, you can set up an eSIM for long road trips in just minutes, giving you seamless, affordable data without the stress.

    What is an eSIM for Travel?

    An eSIM for travel is a digital SIM built into your smartphone. Unlike physical SIM cards, you don’t need to insert or swap anything. You simply activate your eSIM online, and your device connects instantly to the local network.

    And if you’re traveling across rural areas, it’s even worse network coverage can be patchy, and you may find yourself with one bar of signal just when you need to confirm a hotel booking or get directions. For freelancers, travel influencers, and entrepreneurs who rely on the internet to work on the go, this kind of disruption isn’t just frustrating, it can cost you money and opportunities.

    For long road trips, especially across multiple regions or countries, this means:

    • No roaming headaches you connect directly to local networks.
    • No physical SIM swaps because your phone handles everything digitally.
    • Multiple plans on one device: personal, work, and travel profiles together.
    • Instant setup: You can buy and activate within minutes.

    With Nexar’s eSIM solution, Africans can now travel stress-free, enjoying strong connections without paying unfair roaming charges.

    Why Use an eSIM for Travel on Long Road Trips?

    Traveler using eSIM for travel on a long road trip

    Road trips can be unpredictable. One minute you’re streaming music, the next you’re in an area with poor coverage. Here’s why using an eSIM for travel is a game-changer:

    1. Stay Connected Everywhere

    Nexar eSIMs can help you stay connected everywhere. It doesn’t only work when you’re travelling within Nigeria; it also keeps you online when you cross into neighboring countries. So whether you’re on the road for business or just exploring, your internet stays with you

    2. No Hidden Costs

    Traditional roaming is expensive. An eSIM for travel gives you affordable, transparent rates.

    3. Flexibility

    Switch networks or data plans easily without visiting a store.

    4. Time-Saving

    No paperwork or registration delays. Set up your eSIM for long road trips in just minutes.

    5. Dual Usage

    Keep your regular SIM active for calls while using Nexar’s eSIM for affordable data.

    Step-by-Step Guide: How to Set Up an eSIM for Long Road Trips

    Wondering how to set up an eSIM for long road trips? Here’s a quick guide with Nexar:

    Step 1 – Check Your Device

    Ensure your smartphone supports eSIM (most new iPhones, Samsung, and Google Pixel models do). Before you set up your eSIM, confirm if your phone supports it. You can check the official GSMA list of eSIM-compatible devices.

    Step 2 – Get the Nexar App

    Download the Nexar app from the Play Store or App Store. This is where you’ll buy and activate your eSIM plan.

    Step 3 – Choose Your Travel Plan

    Select the eSIM for travel package that matches your trip length or region. Nexar offers flexible plans tailored to African travelers.

    Step 4 – Scan and Activate

    You’ll get a QR code inside the app. Scan it with your phone’s eSIM settings, and your plan activates instantly.

    Step 5 – Hit the Road

    That’s it! You’re now connected with secure, reliable data throughout your journey.

    Common Problems Travelers Face (and How Nexar Solves Them)

    • Problem: Expensive Roaming Fees

    Solution: Nexar’s eSIM for travel connects you to local networks at local rates.

    • Problem: Physical SIM Swaps

    Solution: No more searching for SIM vendors. Activate your eSIM online in minutes.

    • Problem: Poor Connectivity Across Regions

    Many travelers struggle with poor connectivity on the road, just like business owners struggle with verification delays. That’s why Nexar also offers virtual numbers for account verification.

    Solution: Nexar eSIM gives you access to multiple networks, ensuring stable coverage on your road trip.

    • Problem: Limited Payment Options

    Solution: Pay in naira using cards, bank transfers, or wallet balance tailored for African users.

    Why Choose Nexar for Your eSIM for Travel?

    Unlike many global providers that don’t focus on African markets, Nexar was built with you in mind:

    • Affordable rates designed for Nigerians and Africans.
    • Secure transactions with multiple local payment methods.
    • Easy setup in just a few taps.
    • 24/7 support so you’re never stranded.
    • One-stop platform;  buy virtual numbers, pay bills, and manage eSIMs in the same app.

    FAQs on eSIM for Travel and Road Trips

    Q1: Can I use eSIM for both local and international travel?

    Yes, Nexar eSIMs support both local and international usage depending on your package.

    Q2: Do I need to remove my regular SIM?

    No. You can keep your physical SIM active while using your eSIM for travel for data.

    Q3: How long does setup take?

    Usually less than 5 minutes.

    Q4: What if my phone doesn’t support eSIM?

    You’ll need a compatible device. Nexar is expanding support for more models.

    Quick Takeaways

    • An eSIM for travel is the easiest way to stay connected on long road trips.
    • No roaming fees, no SIM swaps, no stress.
    • Nexar makes it simple to set up an eSIM for long road trips in minutes.
    • Affordable, reliable, and built for African travelers.

    If you’re also exploring online opportunities beyond travel, check out our guide on how to grow your TikTok followers organically.

    Stay Connected on Your Next Road Trip

    Don’t let poor connectivity or expensive roaming spoil your trip. With Nexar’s eSIM for travel, you can enjoy seamless data wherever the road takes you.

    Download the Nexar app today and set up your eSIM for travel before your next road trip.

  • Stay Connected Abroad with Nexar’s Travel eSIM

    Imagine landing in a new country and instantly having internet access without switching SIM cards or searching for local network providers. That is the freedom Nexar gives you with our travel eSIM.

    Our eSIM is designed specifically for data only, giving you reliable internet access in the countries we support. Whether you’re in Brazil, Spain, Turkey or France, Nexar’s eSIM lets you stay online for everything that matters like maps, rides, hotel check-ins, Google searches, social media and more.

    Why Choose Nexar’s Travel eSIM?

    • Data Only, No Stress
    • Our eSIM gives you internet access only. No calls, no SMS. But that is not a problem. Apps like WhatsApp, FaceTime and Skype handle that perfectly using data.
    • No Roaming Charges
    • Forget international roaming bills. With Nexar, you get local internet access at fair prices.
    • Instant Activation
    • Buy, scan and connect. That is it. No need to visit a store or swap your SIM card.
    • Affordable

    Whether you’re staying for a few days or weeks, Nexar offers flexible pricing that won’t drain your travel budget.

    How It Works

    Let’s say you travel to Brazil. As long as you’re physically in Brazil, you can activate your Nexar eSIM and get connected immediately. You’ll get a Brazilian data connection, which means smooth browsing, easy navigation and quick access to any platform you need to use.

    There is no need to get a local SIM card or rely on slow airport WiFi. Just scan your eSIM and go.

    Note: Our eSIM works only within the country it is meant for. So if it is a Brazil eSIM, you need to be in Brazil to activate and use it.

    Perfect for Travellers and Digital Nomads

    If you are crossing borders, going on vacation, attending a conference or just exploring a new city, you need internet. Nexar’s eSIM is your pocket-sized solution to stay connected no matter where you are.

    No SIM cards

    No contracts

    No complicated setup

    Just fast, easy and affordable data.